
Discover the best paper mache recipe using flour and water or glue. Make fast easy paper mache crafts at home with expert tips. Learn more today
I still remember the first time I tried a paper mache recipe—it was a messy Saturday, I had no clue what I was doing, and somehow, it turned into a surprisingly fun memory. Over time, I’ve tested all sorts of paper mache recipes, from the classic flour and water paper mache to the smoother paper mache recipe with glue. And trust me, once you find the right mix, crafting becomes addictively simple. In this guide, I’ll walk you through my fast, easy paper mache recipe, share tips I’ve learned from hands-on projects, and help you skip the trial-and-error phase. Ready to get your hands sticky and your creativity flowing? Let’s dive in!
What Is Paper Mache?
Paper mache (sometimes spelled papier-mâché) is a simple craft technique where strips of paper are soaked in a paste—usually made from flour and water or glue—and layered onto a shape or form. Once it dries, it hardens into a lightweight yet sturdy surface that’s easy to paint or decorate.
👉 Short Answer : Paper mache is a crafting method using paper and a sticky paste to create solid, sculpted objects once dried.
You’ll often see paper mache used in:
- School projects and science fair models
- DIY crafts like piñatas and masks
- Home décor items like bowls, wall hangings, and vases
- Theater props or costume pieces
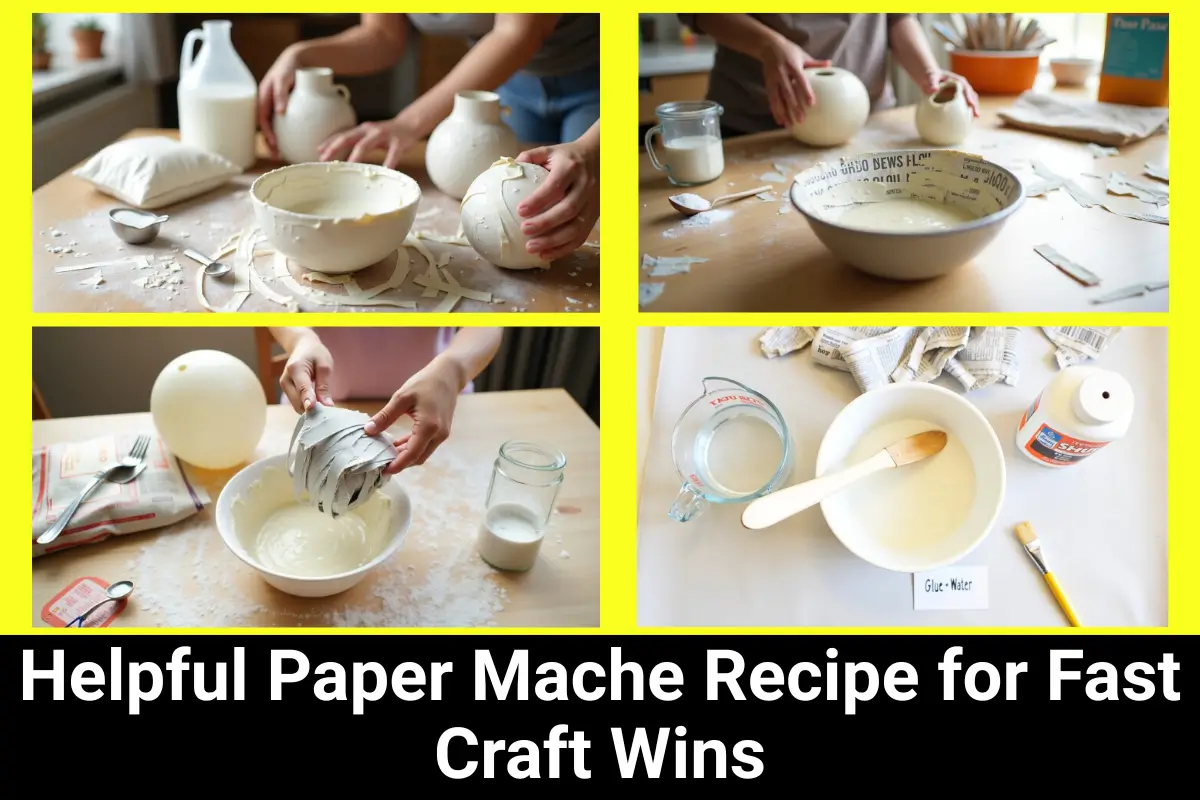
Honestly, my paper mache journey started with a weekend idea to make a watermelon piñata. I didn’t have fancy materials—just newspaper, flour, and a balloon. It turned into one of my favorite go-to crafts. There’s something so satisfying about turning scraps into art with just a fast, easy paper mache recipe and a little patience.
👉 Short Answer : Paper mache is popular in schools, art, and décor because it’s cheap, fun, and easy to shape.
Whether you’re learning how to make paper mache for the first time or exploring new paper mache recipes, it’s a perfect hands-on craft that doesn’t need expensive tools—just your creativity and a little mess tolerance!
The Best Paper Mache Recipe (That I Personally Use)
If you’re just starting out and want a fast, easy paper mache recipe that actually works, this is the one I swear by. It’s cheap, kid-safe, and uses ingredients you probably already have in your kitchen. I’ve used it for years—on everything from piñatas to Halloween masks—and it never lets me down.
👉 Short Answer : The best paper mache recipe uses flour, water, and a pinch of salt—simple, safe, and perfect for beginners.
Ingredients of paper mache recipe:
Here’s what you’ll need for this classic flour and water paper mache recipe:
- 2 cups of flour
- 2 cups of water
- 1 tablespoon of table salt (this helps prevent mold)
👉 Short Answer : Mix 2 cups flour, 2 cups water, and 1 tbsp salt for an easy, non-toxic paper mache paste.
I usually just eyeball the mix now, but when I was new to it, sticking to these measurements made the paste come out smooth every time. And yes, that pinch of salt really does help prevent weird smells if your project takes a few days to dry.
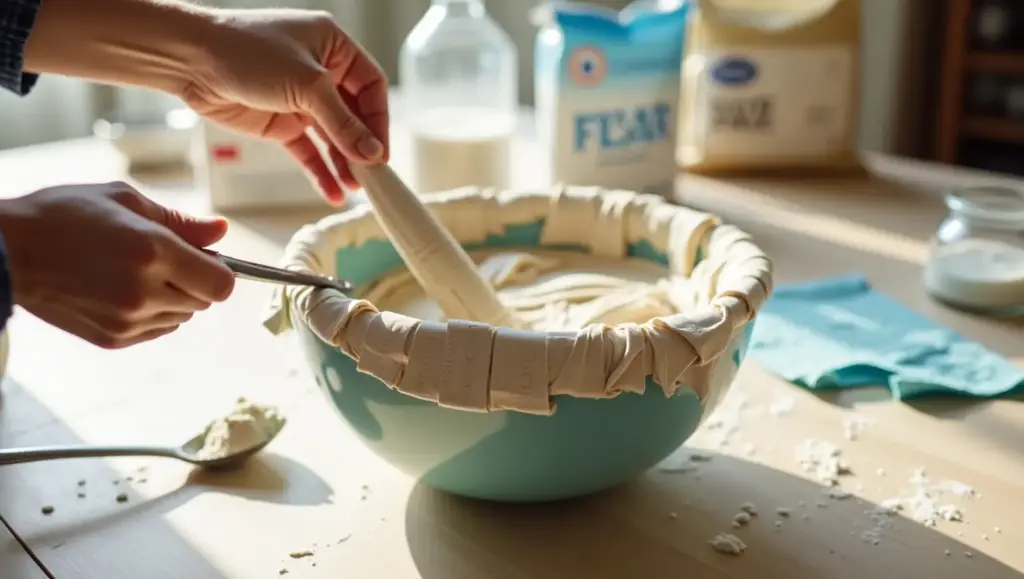
Step-by-Step Instructions
Here’s exactly how I prep and apply my paper mache paste recipe:
- Pre-cut newspaper strips – About 1 inch wide and 6–8 inches long
- Mix the flour, water, and salt – Stir until smooth and creamy, like pancake batter
- Dip and apply – Soak each strip in the paste, wipe off the excess, and layer it on your shape
- Let it dry fully – Give it time before adding more layers or paint (a fan or sunlight helps!)
👉 Short Answer : To make paper mache, dip newspaper strips in flour paste and layer them, letting each coat dry fully before the next.
Pro tip: Always make sure your first layer sticks well to the base (like a balloon, cardboard, or bowl). I’ve rushed that step before—and trust me, peeling paper is not fun mid-project!
Why This Recipe Works
There are so many reasons I keep coming back to this simple paper mache recipe:
- ✅ Natural and safe for kids – No harsh chemicals, perfect for family crafts
- ✅ Made with common household materials – No special glue or store runs required
- ✅ Tried and tested on real projects – I’ve used this on piñatas, masks, wall art—you name it!
👉 Short Answer : This flour-and-water paper mache recipe works because it’s non-toxic, affordable, and strong enough for crafts.
Honestly, there’s something magical about watching plain paper strips turn into a solid, painted creation. Whether it’s a messy Saturday with the kids or a quiet DIY evening, this fast easy paper mache recipe never disappoints.
👉🏿👉🏻 Paper Mache Dragons at Amazon 👈🏻👈🏿
Paper Mache Recipe with Glue – Alternative Version
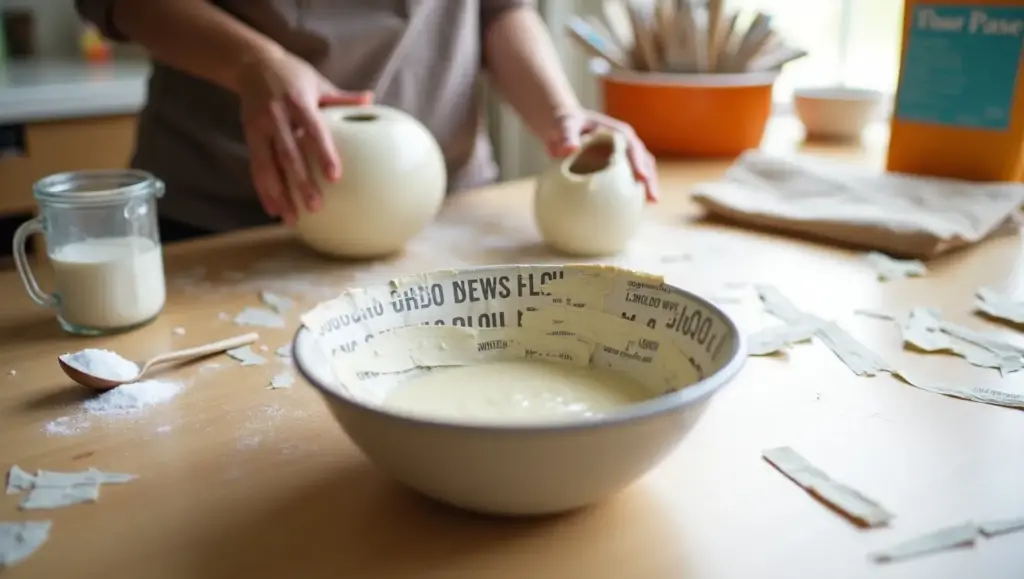
Sometimes, your project needs a little extra smoothness—and that’s where the paper mache recipe with glue steps in. I’ve used this version when I wanted a faster drying time or a more polished look for display pieces. It’s just as easy as the classic flour-and-water paper mache recipe but with a slightly different texture and finish.
👉 Short Answer : Mix 2 parts white glue with 1 part water for a smooth, fast-drying paper mache paste.
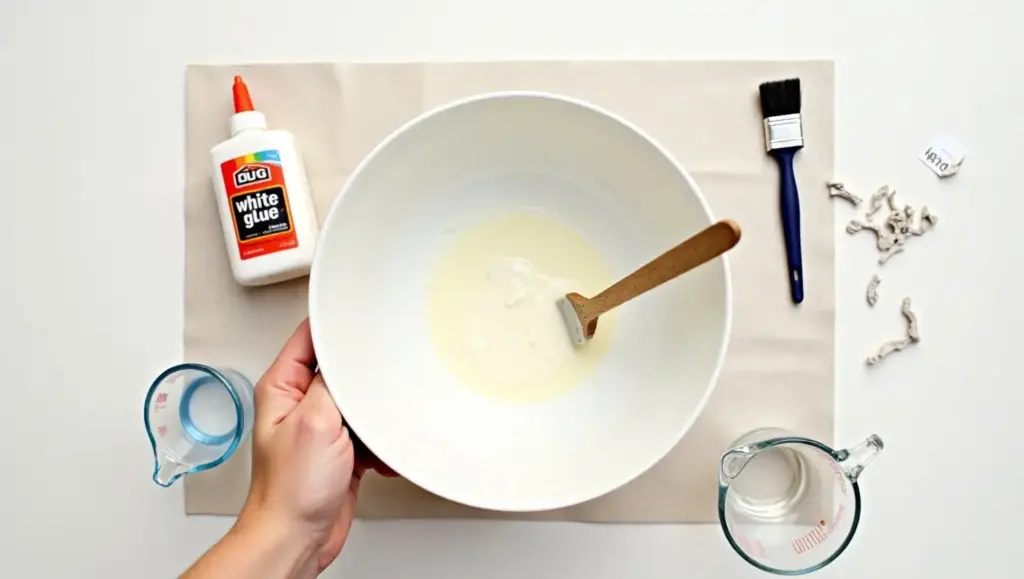
🧪 Recipe: 2 Parts White Glue + 1 Part Water
This glue paper mache recipe couldn’t be simpler. All you need is:
- 2 parts white glue (like school glue or PVA glue)
- 1 part water
Mix them together in a bowl until fully combined. You’re aiming for a thin, milky consistency—just thick enough to coat the paper without dripping too much.
👉 Short Answer : To make a glue paper mache recipe, blend 2 parts white glue with 1 part water until smooth.
This recipe for glue paper mache works especially well for detailed pieces, like masks or ornaments, where you want the surface to feel smoother and look cleaner once dry.
💡 When to Use Glue Instead of Flour
So when should you reach for this paper mache glue recipe instead of the flour one? I usually go for it when:
- I need faster drying time (great when you’re on a deadline!)
- I want a smoother surface for painting or adding detail
- I’m working in humid weather—glue is less likely to attract mold
- I want to avoid the flour smell some people notice during drying
👉 Short Answer : Use a glue-based paper mache recipe when you need faster drying, less chance of mold, or a smoother finish.
I once made a paper mache wall mask using the flour recipe—and it started smelling odd because I left it in a damp room. Since then, for indoor projects or wetter weather, I stick with glue.
👉🏿👉🏻 Fast Mache Fast Drying Instant Papier Mache at Amazon 👈🏻👈🏿
⚖️ Pros and Cons Compared to Flour-Water Paste
Let’s break it down:
| Feature | Flour & Water | Glue & Water |
| Cost | Cheaper (uses pantry staples) | Slightly more expensive (uses store-bought glue) |
| Drying Time | Slower, especially in humid areas | Dries faster, better for tight deadlines |
| Surface Finish | Rougher, more texture | Smoother, great for paint and fine details |
| Mold Resistance | May mold if not dried well or left too long | Less likely to mold |
| Kid-Friendly | 100% edible-safe, ideal for little ones | Safe but not edible |
👉 Short Answer : Flour paste is cheaper and kid-safe; glue paste dries faster and gives a smoother finish.
For piñatas or kid crafts, I still prefer the flour and water paper mache method. But when I made a miniature paper mache vase for décor, the glue version gave it a clean, ceramic-like finish after painting.
✋ My Honest Experience with Both Methods
Here’s the real talk: both recipes work great. I’ve had fun (and a few flops) with each one.
- The fast easy paper mache recipe with flour is my default because it’s budget-friendly, non-toxic, and perfect for beginners.
- The glue version is my go-to when I want speed or a smoother result—especially for gifts or home décor pieces.
👉 Short Answer : I use flour paste for fun family crafts and glue paste for cleaner, faster-drying projects.
One time, I had just two days to finish a Halloween mask before a party. The glue recipe saved me—layers dried fast, and the paint stuck beautifully. But when crafting with my niece, I stick to the flour version so she can get hands-on without worry.
Whether you use the classic flour and water paper mache or the paper mache recipe with glue, both will bring your creative ideas to life. It’s really about choosing the right tool for the job—and sometimes, the mood you’re in. Want something fast and neat? Go with glue. Looking for something cozy, kid-friendly, and nostalgic? Flour it is.
Let your project guide you—and don’t be afraid to mix, match, and make it your own.
Tips for Success with Any Paper Mache Recipe
Over the years, I’ve had my fair share of paper mache wins—and a few soggy disasters too. Whether you’re using the classic flour and water paper mache recipe or trying the paper mache glue recipe, these simple tips can make a big difference. Trust me, they’ve saved my projects more times than I can count!
✅ Cut Strips Before Mixing
Short Answer : Always cut your paper strips before mixing your paper mache paste to save time and avoid sticky fingers.
This one’s a game-changer. I used to mix my paste first and then scramble to cut strips with sticky hands—big mistake. Now, I always prep my newspaper strips in advance, about 1 inch wide and 6–8 inches long. That way, I can just dip and go without stopping mid-project.
Think of it like chopping veggies before cooking. It just makes everything smoother—and way less messy.
✅ Apply Thin Layers for Faster Drying
Short Answer : Thin layers of paper mache dry faster and reduce the risk of mold or peeling.
Thick, gloopy layers might seem like a shortcut, but they backfire. I learned this the hard way when my first piñata stayed wet for three days and started smelling funky. Yikes.
Now I apply just one or two thin layers at a time. It dries faster and creates a smoother, sturdier finish. Bonus: your paint job looks way better too.
✅ Let Each Layer Dry Completely
Short Answer : Always let each paper mache layer dry fully before adding another to avoid soft or sagging shapes.
I know the urge to rush—I’ve been there. But stacking wet layers leads to soggy, unstable projects. It’s like trying to build a house on wet cement.
I usually let each layer dry overnight or at least for 6–8 hours, depending on the weather. If it still feels cold or soft, it’s not ready for the next round. Be patient—your paper mache masterpiece will thank you.
✅ Use Fans or Sunlight to Speed Up Drying
Short Answer : Place your paper mache project near a fan or in sunlight to help it dry faster.
This trick has saved my projects on rainy weekends or when I’m on a deadline. I just pop a small fan nearby or place the piece in direct sunlight for a few hours (never outside if it’s too humid, though).
If you’re using the paper mache recipe with glue, this step works even better since it dries quicker. For flour-based paste, it helps prevent that damp, musty smell too.
❌ Common Mistakes to Avoid
Short Answer : Avoid thick layers, poor drying time, and uncured paste to ensure strong, mold-free paper mache.
Here are a few “oops” moments I’ve had—and how to dodge them:
- Don’t skip the salt in flour recipes. It helps prevent mold, especially in humid weather.
- Never paint on damp mache. The moisture can cause bubbles or peeling.
- Avoid glossy paper. Magazine pages or coated flyers don’t absorb paste well.
- Don’t use too much paste. Your paper should be damp, not dripping.
I still laugh at the time my niece and I used shiny magazine strips… We ended up with a soggy, slippery bowl that never dried. Lesson learned!
These tips have helped me turn my fast easy paper mache recipe into something reliable and foolproof. Whether you’re making a watermelon piñata or a decorative vase, taking a little care with the process can make your paper mache stronger, smoother, and more fun to work with.
🎯 Final Tip : For best results with any paper mache recipe, prep materials early, apply thin layers, and let each one dry fully.
Got a craft in mind? Start small, enjoy the process, and don’t be afraid to get your hands messy. That’s half the fun.
Real-Life Projects I’ve Made with This Paper Mache Recipe
Over the years, I’ve used this paper mache recipe for more fun projects than I can count. Whether it was a rainy day activity, a party craft, or just a way to unwind, this fast easy paper mache recipe always delivered. Here are a few of my all-time favorite creations—and the real stories behind them.
👉🏿👉🏻 Paper Mache Clay at Amazon 👈🏻👈🏿
🎉 Watermelon Piñata
Short Answer : I used the flour and water paper mache recipe to make a fun, sturdy watermelon piñata using just newspaper, a balloon, and paint.
This was the project that started it all. I had this random idea one Saturday to surprise my niece with a homemade piñata for her birthday. We didn’t have much—just old newspapers, a balloon, and basic kitchen stuff. So, I whipped up my go-to flour and water paper mache paste recipe, dipped the strips, and started layering.
By the end of the weekend, we had a chunky little watermelon-shaped piñata. We painted it green and pink, added some black seed dots, and filled it with candy. It wasn’t perfect, but it was adorable—and surprisingly strong. It took a few good whacks to break open! That’s when I knew: this paper mache recipe was a keeper.
👻 Halloween Masks
Short Answer : I made Halloween masks using both flour-based and glue-based paper mache recipes depending on the finish I wanted.
Every October, I get the itch to create something spooky. One year, I tried making a creepy masquerade mask with this same paper mache recipe with glue. The glue version dried faster and had a smoother finish, which was perfect for painting all those eerie details.
But I’ve also made cute monster masks with kids using the classic flour and water paper mache. It’s safer for little hands and gives the masks that rough, rustic charm. We’d all sit around the table with balloons, laugh at our messy faces, and layer away. The best part? Watching everyone’s personality come out in their mask design.
🥣 Decorative Bowls
Short Answer : I’ve made paper mache bowls using both the flour and glue paper mache paste recipes for décor and gifts.
This one started as an experiment but turned into a mini obsession. I made a set of paper mache bowls using balloons as molds and layered strips with my fast easy paper mache recipe. Once dry, I painted them in neutral tones with gold accents and used them for keys, jewelry, and even as gift bowls during the holidays.
For fancier bowls, I switched to the paper mache glue recipe. It gave them that polished, almost ceramic finish after painting. People couldn’t believe they were just paper and paste! One friend even asked where I “bought them from.” (Still proud of that moment.)
These simple projects turned into some of my favorite creative memories. Whether it’s a bright piñata, a spooky mask, or a chic little bowl, the beauty of paper mache is how it turns everyday scraps into something special.
👉 Short Answer : From piñatas to bowls, I’ve used this paper mache recipe for fun, handmade projects that are budget-friendly and beginner-approved.
And the best part? You don’t need fancy tools or a big budget. Just some paper, paste, and a little time. Trust me—once you try it, you’ll be hooked too.
Final Thoughts – Why I Keep Coming Back to This Paper Mache Recipe
There’s a reason this paper mache recipe is the one I keep reaching for—it just works. No matter the project, whether I’m helping my niece make a piñata or crafting a last-minute Halloween mask, this fast easy paper mache recipe always delivers. It’s simple, it’s cheap, and honestly? It’s kind of therapeutic.
👉 Short Answer : This paper mache recipe is my go-to because it’s reliable, affordable, and beginner-friendly.
I’ve tried other paper mache recipes, including the paper mache recipe with glue for smoother finishes. And while that one’s great for certain projects, I always circle back to the flour and water paper mache. It’s like comfort food—but for crafting. No stress, just newspaper strips and some good old-fashioned mess.
👉 Short Answer : The flour and water paper mache method feels nostalgic, safe, and fun for both kids and adults.
More than anything, it’s a fun way to bond. Some of my favorite memories have been spent around the kitchen table, laughing over gluey fingers and watching basic shapes turn into something awesome. Whether you’re a parent looking for a weekend project or just someone craving a creative outlet, this recipe for paper mache using glue or flour is such a great excuse to unplug and get your hands messy.
👉 Short Answer : Paper mache crafts are perfect for family bonding or relaxing solo creativity—no fancy tools needed.
And here’s the thing: once you get the hang of how to make paper mache paste and learn what works for your style, there’s so much room to play. You might tweak the texture, switch to a glue paper mache recipe, or add a drop of food coloring for fun. That’s the beauty of it. This isn’t just a recipe for glue paper mache—it’s a creative doorway.
👉 Short Answer : Feel free to personalize your paper mache recipe—creativity is part of the process!
So if you’ve been wondering what is the best paper mache recipe, I’ll always say: start here. Try this version. It’s fast, easy, and forgiving. Then, make it yours. Add your twist. Use it to tell a story, make a gift, or just have a laugh.
Because sometimes, the best crafts aren’t the perfect ones—they’re the ones you enjoyed making.
FAQs of Paper Mache Recipe
Q1: What is the best paper mache recipe?
A1: The best paper mache recipe uses flour and water or glue and water. It’s easy, fast, and perfect for all paper mache projects.
Q2: How do you make a fast easy paper mache recipe?
A2: Mix 1 part flour with 2 parts water or 1 part glue with 1 part water for a fast easy paper mache recipe that dries smooth.
Q3: What is the recipe for paper mache using glue?
A3: Mix equal parts white glue and water. This paper mache glue recipe dries clear and holds strong for crafts.
Q4: How to make paper mache glue recipe at home?
A4: To make paper mache glue, mix white glue and water 1:1. It’s simple, safe, and great for kids and craft lovers.
Q5: What is the easiest paper mache recipe for kids?
A5: Use 1 cup flour and 2 cups water. This paper mache recipe is safe, non-toxic, and fun for all ages.
Q6: How to make paper mache paste recipe with flour?
A6: Stir 1 cup flour into 2 cups warm water. Mix until smooth. This flour and water paper mache recipe is cost-effective and quick.
Q7: Can I make a paper mache recipe without flour?
A7: Yes! Use 1 part glue to 1 part water. This paper mache recipe with glue works well and dries clear.
Q8: How to make paper mache recipe that dries fast?
A8: Use a glue-based recipe and thin layers of paper. A fast easy paper mache recipe with glue dries quicker than flour.
Q9: What materials do I need for a paper mache recipe?
A9: You need paper, flour or glue, and water. Optional: salt to prevent mold in flour-based paper mache recipes.
Q10: How do I store leftover paper mache paste?
A10: Store paste in a sealed container in the fridge. Flour paste lasts 2–3 days, while glue paste lasts up to a week.